Homelab Vulnerability Scanning with Greenbone OpenVAS, Trivy and ZAP
"We should have some vulnerability scanning" means three different things. Scanning hosts on your LAN. Scanning the container images your fleet runs. Scanning your public-facing web apps. Here is a free, complementary stack that covers all three.
1. Network and host scanning: Greenbone Community Edition
Greenbone Community Edition, which is OpenVAS-based, deploys via an official Docker Compose bundle in a few commands.
127.0.0.1 only, deliberately LAN-inaccessible out of the box. Opening it to your LAN
is a security-relevant change, an admin UI becoming reachable from more places. Treat it as one. Do not flip
the binding without thinking about who can now reach it.
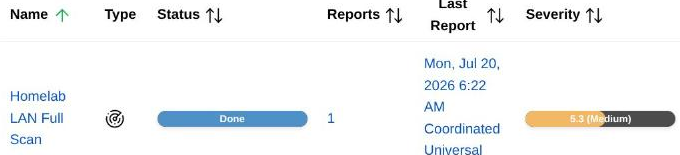
Once configs appear, a full authenticated scan of your whole subnet is straightforward over the GMP protocol, from either the web UI or the CLI tools. A "Full and fast" scan of a typical home subnet takes a few hours. Schedule it monthly rather than weekly, given the runtime.
2. Container image scanning: Trivy
Trivy scans container images for known CVEs by name and tag. No connecting to each host's Docker daemon individually. Run it as a native binary so it scans arbitrary images with no extra setup, and write a small script that scans every image your fleet runs.
grep misreports it as a scan failure. And some images have more than one scanned artifact in the
same report, an OS layer plus a separately tracked binary, so reading only the first table row silently drops
real findings. Scan with --format json and sum with jq instead:
trivy image --severity HIGH,CRITICAL --quiet --format json "$img" > "$img.json"
total=$(jq '[.Results[]?.Vulnerabilities // [] | length] | add // 0' "$img.json")
3. Web app scanning: OWASP ZAP
OWASP ZAP's baseline mode is safe to run against live production sites, including anything security-sensitive. Spider and passive analysis only, no active attack traffic. Run it one-shot per target from its official Docker image.
bash -c containing its own quoted arguments,
reliably makes a variable fail to expand where you expect. Write a real script file with normal, non-nested
quoting and copy it over instead.
chmod 777 the output directory before running, or bind-mount with a
matching non-root UID.
Putting it on a schedule
One-off manual runs are a good start. The real value is recurring scans that get looked at:
- Trivy: weekly. Images update often enough that monthly misses things.
- ZAP: weekly, staggered an hour or so after Trivy so they do not compete for resources on the same host.
- Greenbone: monthly, given how long a full subnet scan takes.
Feeding results into your monitoring stack
If your monitoring system supports local checks, that is a clean way to surface scan trends without building a separate dashboard. A local check is a small script on the monitored host printing a status line the agent picks up as a real service with thresholds. Checkmk works this way. Have each scanner write a small summary file, then have a local check script read it and print WARN or CRIT against a threshold you pick.